
Creative Video Marketing Ideas That Will Drive Traffic to Your Website

Imagine scrolling through your feed, bombarded with generic content that barely catches your eye — until you stumble upon a video so stunning that you can’t look away. That’s the power of video marketing.

But how can you make videos that stand out? This is the question we’d like to answer today.

The Role of Video in Marketing

It’s difficult to even imagine a successful marketing campaign without video nowadays. There are countless marketing statistics that prove the effectiveness of video content in advertising.

Users tend to engage more with videos than with other types of content. Videos give marketers a good ROI and help brands generate leads, increase awareness, web traffic, and sales. From social media clips to long-form educational videos, the right approach to online video marketing can significantly impact conversions and customer loyalty.

But it’s not where the power of video marketing ends. It is also extremely effective for SEO. Search engines like Google prioritize video content, which means it’s easier for businesses to rank higher on results pages.

Well-optimized videos can improve site dwell time, decrease bounce rates, and lead to increased organic traffic. When executed right, a video strategy can enhance brand authority while keeping audiences interested and entertained.

Creative Online Video Marketing Ideas for Driving Traffic

Now that we’ve discussed why video content is so important, let’s take a look at some great video marketing tips that can help your brand drive traffic to your website.

  1. Short-Form Videos

    Creating short-form content is still the best way to handle video marketing. But why is it so great, you may ask?

    The beauty of short videos is that they are brief, get straight to the point, and, most of the time, mobile optimized. Viewers can watch dozens of them in one go, so the chances of them stumbling upon yours are quite high. Moreover, they often tend to go viral. The rise of the short form video app platforms has made it even easier for businesses to create engaging content that reaches wider audiences.

    All you have to do is keep your short videos engaging to pique the audience’s interest and encourage them to visit your website. Research modern trends and use them in your content, include popular music, add a couple of memes, and you’ll see the full power of short videos.

  2. Interactive and Shoppable Videos

    Interactive videos are a game-changer in video marketing for business.

    By incorporating clickable elements, you encourage viewers to engage with the content directly and lead them to explore your products or services on your website. Shoppable videos, for example, allow users to purchase items directly from the video itself, streamlining the customer journey and boosting conversions. Plus, with the right tools, you can easily create text to ai voice and integrate it into your videos and make them even more dynamic and accessible. As a result, your brand can build stronger connections with customers while driving more traffic and sales.

  3. User-Generated Content and Customer Testimonials

    Not every potential customer can be convinced by a professionally made ad. Sometimes the thing they need is a genuine review of another customer.

    That’s why encouraging your buyers to create content around your brand is an excellent way to generate buzz. Ask users to share their experiences to compel potential customers to visit your site.

    It’s even better if they can do it in a short video form, such as Instagram Reels or TikTok clips. You can then download Reels or TikToks and make a compilation of reviews to use in your marketing campaign.

  4. Livestreaming

    Audiences love authenticity, and live videos are a great way to show it. They include real people behind the brand and allow viewers to interact with them in real time.

    You may host live Q&A sessions, do live product demos, or just invite the audience to watch your team’s workday. Such genuine content fosters real-time engagement and makes people interested in your brand, which drives traffic as viewers seek more information on your website.

  5. How-To and Educational Videos

    One of the most effective ways to establish expertise in your industry is by creating how-to videos. These could be tutorials, DIY guides, or step-by-step instructions relevant to your niche.

    For example, if your brand develops software, you may learn how to capture video on PC and record a small guide to show the software’s useful features. And a beauty brand can share make-up tutorials and fitness training how-to clips. If your goal is to educate users at scale, exploring the best eLearning software can also help you turn your video tutorials into structured learning experiences. This not only boosts engagement but also keeps users returning to your website for more in-depth guidance.

  6. Video Challenges and Contests

    Running video contests or challenges is also a good idea for sparking interest and driving traffic.

    Encourage users to participate by submitting their own video content for a chance to win prizes or get discounts. This type of campaign increases brand awareness and brings more visitors to your website when users check contest details, rules, or announcements.

  7. Short Films

    Instead of focusing solely on promotional content, consider telling a story that resonates with your audience.

    To do so, you have to learn more about your viewers first. Find a topic that they’re interested in or worried about, and create a short movie on it. Craft a powerful narrative, make it emotional and inspirational, and you’ll notice that the audience’s connection with your brand becomes stronger. And this connection will definitely prompt them to explore your brand further.

  8. Collaborations with Influencers

    Influencer marketing remains one of the most effective ways to amplify your video content’s reach. Partnering with influencers or industry experts to create videos can expose your brand to a broader audience.

    Influencer collaborations can range from product reviews to guest appearances in your videos, helping drive traffic from their followers to your website.

  9. Repurposing Blog Content into Video Format

    Transforming high-performing blog content into videos is a great way to expand your reach.

    Animated explainers, voice-over slideshows, or condensed video summaries can be engaging alternatives for users who prefer watching to reading. This repurposed content can be shared across multiple platforms, boosting traffic to your original blog posts.

  10. Creative Video Series

    Instead of standalone videos, consider creating a video series that keeps your audience coming back for more.

    It can be a weekly industry insight, a mini-documentary, or an ongoing product showcase, for example. Such content creates anticipation and encourages viewers to visit your website regularly.

  11. Incorporating Humor and Unique Concepts

    People tend to love memes, and a little humor goes a long way in making your brand memorable.

    Fun, lighthearted videos that entertain while subtly marketing your brand can leave a lasting impression on viewers. Think viral challenges, comedic skits, or witty product promotions — anything that makes your content shareable and engaging.

  12. Effective Video Distribution Strategies

    Creating great videos is just one part of the equation — the other is distribution. Don’t limit yourself to one platform — share your content everywhere you can. This way, your video will have a higher chance of reaching the right audience.

    Effective Video Distribution Strategies

    A social media scheduling tool like Viralpep can help streamline this process, allowing you to schedule and publish your videos across multiple platforms effortlessly. By planning your video content in advance and ensuring it reaches your audience at optimal times, you maximize engagement and drive more traffic to your website.

Final Thoughts

It’s getting harder to create content that stands out. But with the right video marketing strategy, you have the chance to be heard.

From interactive experiences to compelling storytelling, your videos should do more than just exist — they should engage, inspire, and drive action. The key is to be intentional and creative, always seeking new ways to connect with your audience. Experiment, improve, and adapt because in online video marketing, innovation is the fuel that keeps your brand visible.

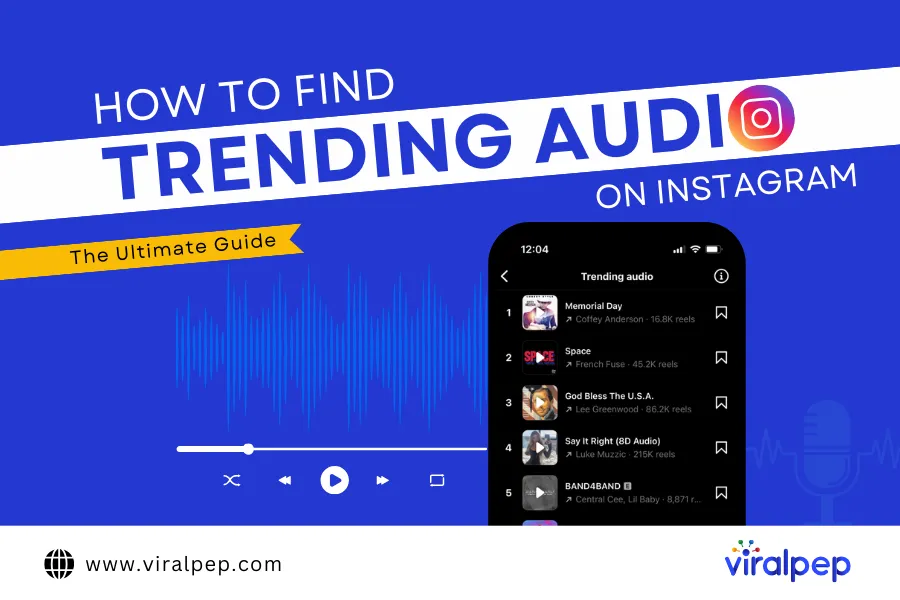
How to Find Trending Audio on Instagram: The Ultimate Guide

Struggling to keep up with how to find trending audio on Instagram? You’re not alone! With new viral sounds emerging weekly, finding the perfect track to boost your Reels engagement can feel like a never-ending challenge.

But here’s the good news—using trending audio on Instagram is one of the easiest ways to increase your content’s reach, visibility, and engagement. In 2025, Instagram’s algorithm continues to favor Reels, making audio selection more crucial than ever.

This guide will walk you through how to find trending audio on Instagram and leverage it effectively in your strategy. Whether you’re a brand, social media content creator, or social media enthusiast, we’ve got you covered.

Let’s dive in and start crafting viral Reels with the hottest Instagram trending songs!

Why is Using Trending Sounds Important on Instagram?

Using trending audio on Instagram can significantly improve your visibility and engagement. While trending music from Instagram can be added to static posts and carousels, it has the biggest impact on Instagram Reels due to the way the video feed works.

Importance of Using Trending Sounds on Instagram

Here’s why incorporating trending songs on Instagram is essential:

  • Algorithm Boost: Instagram’s algorithm favors content that is entertaining and up-to-date with the latest trends. Reels featuring trending audio on Instagram are more likely to gain traction in users’ feeds.
  • Higher Engagement: Trending songs on Instagram encourage interaction through likes, shares, and comments, increasing your content’s overall reach.
  • Better Discoverability: Many users actively search for videos using a specific trending sound, making it easier for new audiences to discover your content.
  • Emotional Connection: Audio helps set the mood, tell a story, or evoke emotions that make your content more memorable.
  • Aligns with Trends: Staying on top of trends keeps your content relevant and shareable.
  • Improves Brand Awareness: Businesses leveraging trending music from Instagram create more relatable content.

To maximize impact, integrate trending audio on Instagram naturally into your content so it aligns with your brand and messaging. From creating humorous videos to setting a specific vibe, music plays a crucial role in enhancing content appeal.

How to Find Trending Audio on Instagram

Finding how to find trending audio on Instagram is crucial for staying relevant and engaging your audience. If you know where to look, you can easily identify trending songs on Instagram to enhance your content. Here are ten effective ways to discover trending audio on Instagram:

  1. Browse Trending Instagram Reels

    One of the easiest ways to find trending audio is by browsing the Reels feed. Instagram’s algorithm tailors content to your interests, so your feed will naturally show relevant trending sounds. Here’s how you can identify them:

    • Scroll through Reels to see commonly used sounds.
    • Click on the audio name (next to the music icon) to open the sound page.
    • Trending song on Instagram may have an arrow next to their name instead of a music note.
    • Check how many times an audio track has been used and its origin.
    • Tap “Use Audio” to start creating your own Reel and download the reel with the trending music from Instagram.
  2. Follow the Instagram Creators Account (@Creators)

    Instagram’s official @creators account regularly shares trend reports and insights from industry experts. It’s an excellent resource for discovering:

    • Weekly updates on trending audio on Instagram.
    • Best practices for using Instagram trending songs in content.
    • Tips from successful content creators.
  3. Instagram’s Trending Audio List

    Professional Instagram accounts can access a built-in Trending Audio List through the Professional Dashboard. This curated list highlights the top 50 most popular sounds. Here’s how to find it:

    1. Open your Professional Dashboard from your Instagram profile.
    2. Scroll to Tips and Resources.
    3. Select Trending Audio to explore popular sounds.
  4. Explore YouTube Shorts

    Trending sounds on YouTube Shorts often gain traction on Instagram too. To find trending audio:

    • Open YouTube and tap the “+” button.
    • Select Add Sound at the top.
    • Browse the Top Sounds list.
    • Note the song title and search for it in Instagram’s audio library.
  5. TikTok’s Trending Sounds

    Trends often originate on TikTok before spreading to Instagram. Use these methods to discover trending TikTok audio:

    • Use TikTok’s Sound Library by tapping the “+” button and selecting Add Sound.
    • Scroll through the Recommended section for popular audio clips.
    • Check the For You page for frequently used sounds in viral videos.
    • Visit TikTok’s Creative Center (desktop) and navigate to the Trending Sounds section.
    • Follow trend-focused accounts like @tiktoktrends for weekly updates.
  6. Use Meta Sound Collection

    Meta’s Sound Collection provides a vast library of licensed audio available for use on Instagram and Facebook. To find trending sounds:

    • Open Meta Sound Collection via the Meta Business Suite.
    • Sort by Most Popular to discover top-trending audio.
  7. Monitor Top Instagram Creators in Your Niche

    Influencers and top content creators often use the latest trending audio. Identify successful creators in your industry and check:

    • What audio they frequently use.
    • The engagement levels on their posts.
    • Their most popular Reels for audio inspiration.
  8. Explore Page Search & Hashtags

    Instagram’s Explore Page is another way to find trending sounds. To refine your search:

    • Use keywords or hashtags like #TrendingAudio or #ReelsTrend.
    • Switch the search tab to Audio to find relevant sounds.
    • Click on an audio file to see its popularity and usage.
  9. Check Streaming Platforms for Viral Songs

    Trending songs on Spotify, Apple Music, and YouTube Music often make their way to Instagram. Look for playlists like:

    • Viral Hits
    • TikTok Top 50
    • Instagram Reels Trends Once you find a track, search for it in the Instagram audio library. If it has the “Trending” arrow, it’s gaining traction on the platform.
  10. Use Instagram’s Music Suggestions When Creating a Post

    Instagram suggests trending audio when you create a post. To access it:

    • Tap Add Music when making a Reel.
    • Browse the Trending section for popular sounds.
    • Instagram may also recommend tracks based on your content type.

Find Trending Sounds and Go Viral on Instagram!

Now that you know how to find trending audio on Instagram, it’s time to put that knowledge to work. Whether you’re exploring the Reels Explore page, following creator trends, or leveraging external platforms, staying ahead of trending songs on Instagram is the key to boosting engagement.

But finding the right audio is just one piece of the puzzle. To truly maximize reach, you need a consistent posting schedule and insights into the best times to post—and that’s where Viralpep comes in.

With Viralpep’s social media scheduler, you can:

✅ Schedule Instagram Reels at peak engagement times.
✅ Track performance analytics to see which sounds work best.
✅ Manage multiple social accounts effortlessly.
✅ Automate your content strategy while staying on top of trends.

Want to see your Instagram content skyrocket? Start your 15-day free trial with Viralpep today!

FAQs

Look for the upward arrow next to the trending audio on Instagram when browsing Reels

Can I download music from Instagram?

No, Instagram doesn’t allow direct downloads, but you can save audio within the app and download audio from audio download tools.

Engagement matters! Interact with other posts, use relevant hashtags, and post at peak hours.

Instagram trending songs shift weekly or even daily, so stay updated by checking the Reels music library frequently.

Can I use any song for my business on Instagram?

Not all songs are available for commercial use—check Instagram’s licensed music library for business-friendly tracks.

What is the best way to find viral audio before it peaks?

Follow trend forecasting tools like TrendTok and monitor Spotify’s viral playlists.

Yes! Using trending songs on Instagram increases visibility, engagement, and potential virality.

How to Develop ERP Software: A Step-by-Step Guide

Enterprise Resource Planning (ERP) systems are the hub around which current business operations function. In 2025, businesses are prioritizing ERP customization as part of emerging enterprise resource planning trends to stay competitive. They link together and improve areas such as finance, supply chain, HR, customer service, and project management.

Many companies use generic off-the-shelf ERP systems like SAP, Oracle, and Microsoft Dynamics. These platforms offer many capabilities but are not very flexible. Most organizations also find unnecessary features, integration problems, and limited expandability.

This raises an important question: Should you buy an ERP system, or is it better to create one?

This guide outlines the ERP development process in detail, covering the best ERP development practices for 2025 and how custom ERP solutions can improve efficiency. It also discusses how Viralpep, a leading social media management platform, can be integrated with ERP systems to enhance the decision-making processes of businesses when it comes to optimizing their digital marketing strategies.

Why Build a Custom ERP Instead of Buying One?

This is because while there are many ERP solutions in the market, businesses still prefer to develop their own system instead of purchasing one.

  1. Customization and Business-Specific Features

    Off-the-shelf ERP systems are general-purpose systems and therefore come with features that will be useful to most businesses and others that will be of no use. They also may not have some features that are critical to your industry.

    With custom ERP software development, businesses can build applications that are specifically designed to meet their business processes.

  2. Scalability for Business Growth

    Pre-packaged ERP systems may be a good starting point but are often followed by expensive customizations and upgrades as the business grows.

    A custom-built ERP system is built to grow with the business, and there are no additional charges for licensing.

  3. Better Integration with Existing Tools

    On top of that, most companies already use a number of other software applications to run their businesses.

    It can be difficult and expensive to integrate an off-the-shelf ERP with these tools. With custom ERP development, organizations can build a system that can easily work with their current applications, including Viralpep for social media management.

  4. Long-Term Cost Effectiveness

    The cost of developing a custom ERP system is upfront, but this eliminates the costs of licensing fees, extra features, and vendor dependence in the long run.

    Organizations that invest in a tailored ERP system do not have to worry about the future costs that come with modifying a generic system.

The Role of Social Media Management in ERP Systems

Today, social media plays an essential role in the business world—in branding, customer communication, and sales.

While traditional ERP systems are built around internal business processes, the integration of social media management tools provides organizations with a more holistic operational view.

This is where Viralpep comes in.

What is Viralpep?

Viralpep is a social media management system that provides businesses with the ability to schedule content, track engagement, and analyze the performance of their social media accounts across various platforms.

As a result, organizations can improve their management of digital marketing activities and link them to their overall business objectives through the integration of Viralpep with an ERP system.

Key Features of Viralpep:

  • Content Scheduling – You can schedule and automate the posting of social media content across different channels from the control center.
  • Analytics & Reporting – Get detailed performance data, measurement of interactions, and information about your audience.
  • Team Collaboration– Manage tasks, get approval, and organize workflows for your social media activities.

How to Develop a Custom ERP System – A Step-by-Step Approach

Step 1: Planning and Requirement Analysis

Before starting, businesses must decide: Custom ERP vs off-the-shelf ERP—which is better? A custom ERP ensures flexibility, while pre-built solutions offer quick deployment. It is important to plan ahead when creating an ERP system to avoid costly modifications later.

Define Your Business Objectives:

State the main objectives of your ERP system. Common objectives include:

  • Automating financial processes and reporting.
  • Controlling and improving supply chain and inventory management.
  • Improving sales and marketing analytics.
  • Enhancing human resource management.
  • Integrating digital marketing tools like Viralpep.

List Essential ERP Features:

Every business has unique needs, but common ERP features include:

  • Finance & Accounting – Budgeting, payroll, invoicing, and tax reporting.
  • HR & Employee Management – Onboarding, performance evaluation, and payroll.
  • Supply Chain & Inventory – Vendor management, order tracking, and stock management.
  • CRM (Customer Relationship Management) – Sales automation, customer data management.
  • Project Management – Task tracking, workflow automation.

All are crucial elements of business process automation that help companies improve efficiency.

Step 2: Choosing the Best Technology Stack

This is because the performance, scalability, and security of your ERP are dependent on the technology stack you choose.

Common Technology Stack Options:

  • Backend: Python (Django, Flask), Node.js, Java (Spring Boot)
  • Frontend: React.js, Vue.js, Angular
  • Database: PostgreSQL, MySQL, MongoDB
  • Cloud Services: AWS, Azure, Google Cloud
  • Security Measures: Role-based access control (RBAC), multi-factor authentication (MFA), data encryption

If your business is connected with digital marketing, you should include Viralpep’s API in the ERP system to integrate social media management among other business functions.

Step 3: Developing the ERP System Architecture

Here is how ERP systems are designed from an architectural perspective.

Monolithic Architecture

  • Easier to create and deploy initially.
  • Easier to debug and maintain.
  • Less flexible for scaling and future modifications.

Microservices Architecture

  • More flexible and scalable.
  • More opportunities for single module improvements without affecting others.
  • More challenging development approach.

For companies that want to link several external tools such as Viralpep, the microservices approach is generally the most suitable. It ensures that each ERP module can be scaled and improved independently.

Step 4: ERP Development Process

a) Develop the Minimum Viable Product (MVP)

It is not recommended to develop a full-fledged system at the beginning; rather, it is better to start with an MVP (Minimum Viable Product).

An MVP is a basic version of the system that has the most important features and can be used by businesses to:

  • Get early feedback from real-world users and test the system’s functionality.
  • Minimize development costs.
  • Ensure that the ERP system is useful and practical for real business use.

b) Backend and Frontend Development

Once the MVP is successful, the full ERP development process starts.

  • Backend engineers work on the business logic, API, and database.
  • Frontend engineers focus on UI development.

c) Integration with Current Business Tools

To ensure smooth operations, the ERP system must integrate with existing tools such as:

  • CRM software.
  • Accounting platforms.
  • Warehouse management systems.
  • Social media management tools such as Viralpep.

Step 5: Testing, Deployment, and Maintenance

Testing Process

Thorough testing of the ERP system is crucial before its release.

  • Functional Testing – Ensures all modules work as expected.
  • Security Testing – Identifies vulnerabilities to prevent threats and data breaches.
  • Performance Testing – Confirms that the system can handle peak loads efficiently.

Deployment Strategies

Here are different ways an ERP system can be deployed:

  • Big Bang Deployment: The system is released to the entire organization at once. (High risk, but fast.)
  • Phased Rollout: New features are added gradually. (Low risk, allows users to adapt over time.)
  • Parallel Deployment: Both the old and new systems run simultaneously until the full switch is made.

Most organizations prefer a phased rollout, as it causes minimal disruption to business operations.

Ongoing Maintenance & Scaling

ERP systems require continuous improvement to remain relevant. This includes:

  • Routine maintenance and bug fixes.
  • Security upgrades.
  • Adding new features based on evolving business needs.
  • Optimizing system performance to improve efficiency.

Conclusion: Is Custom ERP Development Worth It?

For organizations with specific business processes, developing a custom ERP system tailored to their needs offers several advantages:

  • Total control over features and integrations.
  • Higher scalability for long-term growth.
  • Overall cost-effectiveness compared to modifying an off-the-shelf system.

With Viralpep, a custom ERP can help businesses manage their social media campaigns, track the effectiveness of their digital marketing strategies, and engage with customers—all within one system.

If you are planning to develop an ERP, 

  • Start with small increments, 
  • Implement features based on real-world data, and 
  • Gradually build up the system.

The result? A fully customized ERP that enhances efficiency, optimizes workflows, and drives business success.

Looking to integrate social media with your ERP system? Try Viralpep today to streamline your digital marketing and enhance business decision-making. Start your free trial now.

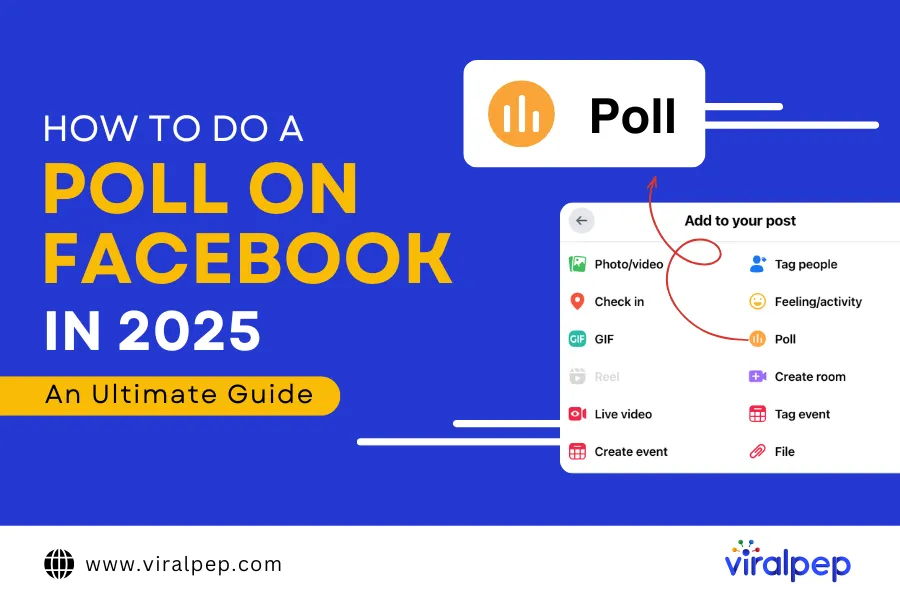
How to Do a Poll on Facebook in 2025 : An Ultimate Guide

The concept of gathering public opinions through polls has been around for centuries. But gone are the days of time-consuming paper surveys and manual data collection.

Today, technology allows us to conduct polls effortlessly, and Facebook is one of the best platforms for engaging with your audience through quick and interactive polls.

If you’re still relying on outdated methods, it’s time to embrace the convenience of Facebook polls. Whether you’re a business owner, a social media manager, or just someone who loves sparking conversations, learning how to do a poll on Facebook is easier than you think.

Worried it might be too technical? Don’t be! With the right guidance and a reliable social media management tool like Viralpep, you can set up a poll in minutes.

In this blog, we’ll walk you through how to create a poll on Facebook step by step, explore different Facebook poll options, and answer frequently asked questions to help you maximize engagement.

What Are Facebook Polls?

Facebook polls are an interactive feature that allows users to create multiple-choice questions to gather opinions from their audience. Whether you want feedback on a product, engagement on a trending topic, or just a fun way to interact with your followers, Facebook survey polls provide a simple yet effective solution.

These polls can be created on your timeline, in stories, or on business pages, making them a versatile tool for brands, influencers, and everyday users. When setting up a poll on Facebook, you can choose between public and private options—public polls are visible to everyone, while private polls are restricted to selected participants.

Benefits of Using Facebook Polls

  • Quick Feedback: Get instant opinions on products, services, or ideas.
  • Enhanced Engagement: Encourage audience participation and interaction.
  • Market Research: Understand customer preferences and trends.
  • Fun & Interactive: Create entertaining polls to keep your followers engaged.

One of the best features of how to do polls on Facebook is their flexibility. You can set a deadline for responses, view real-time results, and even allow participants to add their own answers. Once the poll ends, the results are displayed, showing the total votes and percentages for each option.

Facebook polls are a powerful way to understand your audience while keeping your content fresh and engaging. Now that you know what they are, let’s explore how to create one step by step!

Why Should You Create a Facebook Poll?

Facebook polls serve multiple purposes, making them a valuable tool for businesses, influencers, and casual users alike.

Benefits of Using Facebook Polls

Here’s why you should consider using them:

  1. Gather Instant Feedback

    Need quick insights on a product, service, or idea? Learning how to make a survey on Facebook enables you to collect immediate responses from your audience, helping you make informed decisions based on real-time feedback.

  2. Boost Engagement

    How to make a poll on FB is a fantastic way to encourage interaction on your page. They often spark conversations, generate comments, and even get shared, increasing your visibility and reach on Facebook. Growing a larger audience can further increase poll participation and engagement, which is why many creators choose to buy Facebook followers to expand their reach and build an active community.

  3. Test Audience Knowledge

    Want to see how much your followers know about a topic? How to create a poll on Facebook timeline can be used as a fun quiz to test knowledge and keep your audience engaged while learning something new.

  4. Strengthen Audience Connections

    By inviting your followers to participate in a survey on Facebook, you create a sense of community and involvement. Understanding their opinions makes them feel valued and deepens your connection with them.

  5. Enhance Market Research

    Facebook polls can act as a mini-market research tool, helping you gauge customer preferences, track trends, and shape your Facebook marketing strategies accordingly.

    Whether you want to engage your audience, collect feedback, or get more followers on Facebook, polls offer a simple yet effective solution. Give it a try—head over to your Facebook page and create your first poll today!

Where Can You Create Facebook Polls?

Facebook offers multiple ways to create polls, depending on where you want to engage your audience. Here’s how to set up a poll on Facebook in different areas:

  1. Facebook Stories

    With poll stickers available in Facebook Stories, you can create interactive polls that appear directly in your followers’ story feed. These quick, engaging polls allow users to vote with just a tap, making them perfect for capturing instant feedback. You can add visuals like images or GIFs to make your poll more eye-catching.

  2. Facebook Business Page

    If you want to gather insights from your followers, you can create a poll directly on your Facebook Business Page. This is an excellent way to boost engagement and collect audience opinions on products, services, or trending topics. Note that poll creation on business pages is currently available only through the Facebook mobile app.

  3. Facebook Groups

    Polls in Facebook Groups allow you to gather feedback from community members in a collaborative setting. Whether you’re running a business group, fan page, or private community, group polls encourage discussions and help members voice their preferences.

  4. Facebook Events

    Planning an event? Facebook Event polls are great for gathering opinions from attendees. You can ask guests about preferences such as event schedules, food choices, or activity options, making event planning more interactive and efficient.

  5. Facebook Group Chats

    For quick and informal decision-making, Facebook also allows you to create polls within group chats. Whether you’re planning a meetup, choosing a topic for discussion, or coordinating activities, chat polls offer a fast and simple way to get input from participants.

    No matter where you create a Facebook poll, the process is straightforward and highly effective in engaging your audience. Try it today and see how your followers respond!

Step-By-Step Guide to Creating a Facebook Poll

Now that you know why polls are beneficial, let’s explore how to create one on different Facebook platforms.

Step Guide to Creating a Facebook Poll

  1. How to Create a Poll on Facebook Story

    According to Meta, 300 million people use Facebook Stories daily. Research also suggests that 62% of users become more interested in a brand after seeing it in Facebook Stories.

    Here’s how to create a poll on Facebook Story using your mobile device:

    • Tap on the blue circle with the + sign to “Create Story.”
    • Select an existing video/photo from your gallery or tap the camera icon to capture new media.
    • Tap the stickers (smiling face) icon in the top-right corner and select Poll.
    • Type your poll question and customize the answer options (e.g., Yes/No).
    • Tap Done and then Share to post your poll.
  2. How to Create a Poll on a Facebook Business Page

    Only Facebook page administrators can create polls on business pages. Here’s how:

    • Switch to your Facebook Page.
    • Click on ‘What’s on Your Mind’ in the post creation section.
    • Select the Poll option.
    • Type your question and add response options.
    • Once you’re done, tap Post to publish your poll.
  3. How to Create a Poll on a Facebook Event

    If you’re hosting an event, polls are great for gathering opinions on event-related decisions.

    1. Navigate to Events and select the event.
    2. Tap the three dots in the bottom-right corner.
    3. Choose Poll.
    4. Enter your question and response options.
    5. Click Post to publish.
  4. How to Create a Poll in a Facebook Group

    Facebook Groups provide a strong sense of community. Here’s how to create a poll within a group:

    • Go to Groups & Your Groups and select your group.
    • Click Poll in the post creation options.
    • Type your question and provide response options.
    • Tap Post to publish.
  5. How to Create a Poll in a Facebook Group Chat

    Polls in group chats help streamline decision-making. Here’s how to create one:

    1. Open the Facebook group chat you want to create a poll in.
    2. Tap the three dots in the top-right corner.
    3. Select Create Poll.
    4. Enter your question and up to five response options.
    5. Tap Send to share your poll.

Final Thoughts

Now that you know how to do a poll on Facebook, you can start using polls to engage your audience and gain valuable insights. By integrating polls into your social media strategy, you can encourage interaction, collect feedback, and make informed decisions based on audience responses.

To simplify Facebook post scheduling, using a social media management tool can be highly beneficial. A tool like Viralpep allows you to schedule and manage Facebook posts effortlessly, ensuring consistent engagement with your audience. Additionally, built-in analytics help track post performance, giving you deeper insights into audience interaction and content effectiveness.

Leverage Facebook polls options to enhance your social media presence and connect with your audience more effectively. Start creating polls today and make data-driven decisions that boost engagement and brand growth!

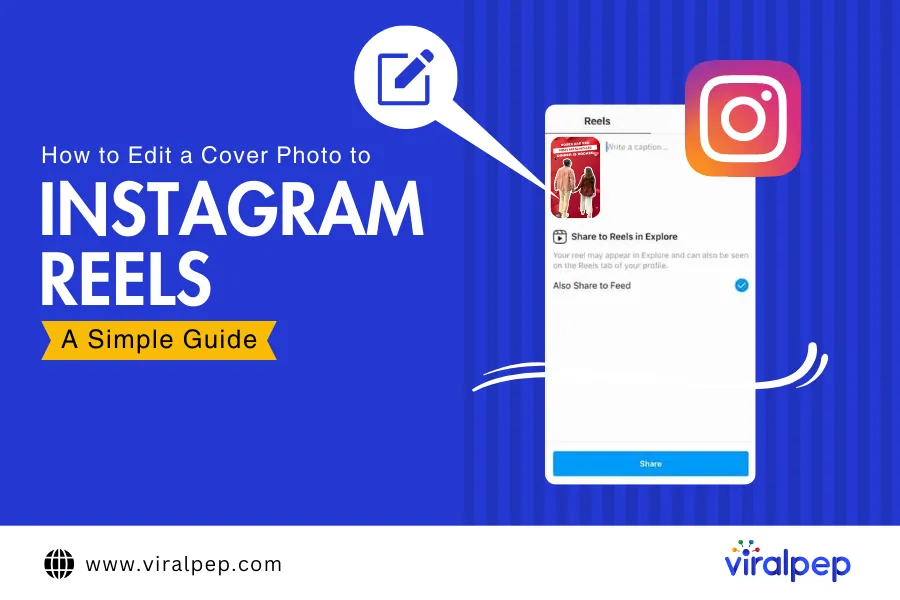
How to Edit a Cover Photo to Instagram Reels: A Simple Guide

Instagram Reels have become one of the most popular features on the platform, offering users a fun way to engage with their followers through short, creative videos. Whether you want to know how to make Reels on Instagram or how to edit Reels after posting, this guide has you covered.

While Reels are fantastic for sharing content, they might not always fit your carefully curated Instagram aesthetic—especially when it comes to profile grids. That’s where the Instagram Reels editing process for a cover photo comes into play. Adding a cover photo to your Instagram Reels allows you to maintain a cohesive look on your profile while still content on social media. Even better, Instagram now lets you edit the cover photo on an already published Reel, giving you the flexibility to improve your visual branding at any time.

In this article, we’ll walk you through how to post Reels on Instagram, add, change, and edit the cover photo for your Instagram Reels. Let’s dive in!

How to Add a Cover Photo to Instagram Reels

Adding a cover photo to your Instagram Reel is a simple process, but it’s an important step in keeping your profile grid neat and visually appealing. Follow these easy steps to ensure your Reels match your brand aesthetic:

  1. Create Your Instagram Reel: Record your Reel as usual and move to the “Share” settings screen by tapping Next.

Create Your Instagram Reel

  1. Tap on “Cover”: On the Reel preview screen, tap the Cover option located on the preview image of your Reel.

Tap on Cover

  1. Choose Your Cover Image:
      • You can select a still frame from your video by dragging the selector icon across the video timeline.

     Choose Your Cover Image

      • Alternatively, tap Add From Camera Roll to upload a high-quality image directly from your phone’s photo library.

    Add From Camera Roll

  2. Pro Tip: Images from your Camera Roll are usually higher quality than a still taken from the video footage.
  3. Preview and Edit: Once you’ve selected your cover image, you can adjust how it appears on your profile grid. Tap Crop Profile Image to reposition, zoom in, or zoom out.

Preview and Edit Reel

By following these steps, you ensure that your Reels align with your overall Instagram aesthetic, keeping your profile looking sleek and well-organized.

How to Edit Reel Cover Photo on Instagram After Posting

Wondering how to edit an Instagram post or specifically its Reel cover photo? Instagram now allows you to edit the cover photo of a Reel even after it’s been posted. This is a great update, especially if you want to refresh older Reels or ensure your feed stays visually cohesive.

Here’s how to edit a Reel cover photo after posting:

  1. Open the Published Reel: Go to your Instagram profile and tap on the Reels tab to find the video you want to edit.

Open the Published Reel

  1. Tap the Three Dots: On the right-hand side of the screen, click the three-dot menu to open additional options.

Tap the Three Dots

  1. Select “Edit”: From the dropdown menu, select Edit to begin modifying your Reel.

Select Edit

  1. Edit the Cover Photo: Tap Cover on the Reel preview image, then choose either:
    • A new still from the video timeline by dragging the selector icon.
    • An image from your Camera Roll for a fresh look.

    Edit the Cover Photo

  2. Save Changes: Once you’re happy with the new cover photo, hit Done to save the update.

Save Changes

This flexibility in Instagram Reels editing is a game-changer for anyone serious about their Instagram branding.

Why Adding a Cover Photo to Instagram Reels is Important

You might wonder, “Why is adding a cover photo to Instagram Reels so important?” The simple answer is that it helps maintain the overall aesthetics of your profile while providing viewers with a clean, professional look. Here are a few reasons why you should make it a habit:

  • Brand Consistency: A custom cover photo ensures that each Reel fits into your Instagram feed’s visual theme, helping you build a recognizable brand image.
  • Increased Engagement: A well-designed cover photo can attract more viewers to your Reel, encouraging more likes, comments, and shares.
  • Professional Appearance: When your Reels match the look and feel of your other content, your profile appears more polished and organized, which could lead to more followers and better engagement on Instagram.

In short, adding and editing cover photos on Instagram Reels is an easy but effective way to elevate your social media content and enhance your Instagram presence.

Common Mistakes to Avoid When Adding a Cover Photo to Instagram Reels

While adding a cover photo to your Reels may seem like a straightforward task, some common mistakes can hinder your visual branding efforts. Here are a few things to avoid:

  1. Choosing Low-Quality Images: Ensure that the image you choose for your cover photo is high quality. Blurry or pixelated images won’t make your Reel look professional.
  2. Ignoring Aspect Ratios: Instagram’s profile grid uses a 1:1 aspect ratio, so make sure your cover photo fits within that ratio to avoid awkward cropping.
  3. Not Maintaining Consistency: If your feed has a certain color scheme or style, make sure your cover photos reflect that. Randomly chosen images can make your profile look disorganized.
  4. Overcomplicating the Design: Keep your cover photo simple and clear. Too much text or cluttered visuals can confuse your audience and reduce the effectiveness of the image.

By avoiding these common mistakes, you can ensure your Instagram Reels always look their best.

Tips for Designing an Eye-Catching Instagram Reels Cover Photo

Designing a cover photo isn’t just about uploading any image—it’s about choosing one that resonates with your audience. Whether you’re editing videos for Instagram or creating Instagram Reels editor-ready content, these tips will help:

  • Use Bold, Readable Fonts: If you include text on your cover photo, use large, bold fonts that are easy to read, even on smaller screens.
  • Incorporate Your Brand Colors: To keep your brand identity strong, make sure your cover photo aligns with your brand’s color palette.
  • Be Consistent: Use similar cover photo styles across all your Reels to create a cohesive look.
  • Highlight Key Visuals: If your Reel features a special moment or action, make that the focus of your cover photo.

By following these tips, you can create cover photos that not only look great but also boost engagement with your Reels by posting them at the best time on Instagram.

Conclusion: Enhancing Your Instagram Aesthetic with Reels Cover Photos

Adding and editing cover photos for Instagram Reels is a simple yet powerful way to enhance your profile’s aesthetic. Whether you’re uploading a new Reel or updating an older one, this feature allows you to maintain a cohesive visual identity that reflects your brand.

Don’t forget that the cover photo is the first thing people see when they encounter your Reel, so make it count!

Take your Instagram game to the next level by mastering this feature. If you’re ready to streamline your social media strategy even further, consider using tools like Viralpep to schedule and plan Instagram content in advance.

Frequently Asked Questions (FAQs)

Can I change my Instagram Reels cover photo after posting?

Yes, Instagram now allows you to edit your Reels’ cover photos even after they’ve been posted.

How do I add a custom cover photo to my Instagram Reel?

You can add a custom cover photo by selecting a still frame from your video or uploading an image from your Camera Roll.

Why should I add a cover photo to my Instagram Reels?

Adding a cover photo helps maintain a cohesive aesthetic on your profile and can boost engagement.

What’s the best size for an Instagram Reels cover photo?

Instagram uses a 1:1 aspect ratio for the grid, so your cover photo should be square (1080px by 1080px).

Can I use text on my Instagram Reels cover photo?

Yes, you can add text to your cover photo, but make sure it’s large and legible, especially on smaller screens.

How do I edit the cover photo of a Reel already posted?

Go to the Reel, tap the three dots, select “Edit,” then change the cover photo by choosing a new still or uploading an image.

What’s the best way to design an Instagram Reels cover photo?

Keep it simple, use bold fonts, align with your brand colors, and highlight key visuals from the Reel

How to Make Money with Affiliate Marketing: A Complete Guide

Affiliate marketing is one of the most effective ways to earn money online by promoting other people’s products or services. Once you set up your affiliate marketing campaigns, it has the potential to generate passive income consistently. While the initial effort of creating visibility for your affiliate offers can be challenging, the long-term rewards make it a worthwhile endeavor.

For beginners, understanding how to make money with affiliate marketing often feels overwhelming. With so many resources available online and claims like “make money while you sleep with affiliate marketing,” it’s easy to get confused. However, understanding the fundamentals and adopting the right strategy can simplify the process and set you up for success.

Affiliate marketing is not a get-rich-quick scheme, but it is a legitimate way to earn money online if done correctly. To understand its potential, it’s essential to first grasp what is affiliate marketing and how it works. Many successful affiliates report steady income growth yearly by following proven strategies. For instance, approximately 30% of the revenue from many blogs is generated through affiliate marketing, showing its effectiveness as a reliable income source. If you’re also curious about platforms like TikTok, you might wonder, how much money per view on TikTok can contribute to an overall income strategy, especially when combined with affiliate promotions. Exploring this can give you a broader understanding of how social media can work hand-in-hand with affiliate marketing.

In this post, we’ll walk you through how to make money with affiliate marketing by outlining the exact steps to get started and the strategies you need to make it work. Whether your goal is to earn $100 per day or scale that to $1,000 per day, this guide will provide actionable insights to help you achieve those milestones.

The best part? Affiliate marketing doesn’t require you to create your own products or services. All you need is a website, the right approach, and the willingness to learn. With the affiliate marketing industry projected to grow from $8.2 billion in 2022 to an estimated $10.72 billion by 2024 (according to Influencer Marketing Hub), now is the perfect time to get started.

By learning how can you make money with affiliate marketing and taking the first steps today, you’ll position yourself to take advantage of this growing opportunity and build a sustainable source of online income. Let’s dive into the world of affiliate marketing and discover how you can turn it into a successful venture.

What Is Affiliate Marketing?

Affiliate marketing is a performance-driven marketing approach where businesses compensate individuals or organizations (affiliates) for promoting their products or services and driving new customers. It operates on a commission-based model, making it a mutually beneficial system for both the business and the affiliate.

If you’re wondering, how do you earn money from affiliate marketing, the process involves three primary participants:

  1. The Merchant – The company or business offering a product or service.
  2. The Affiliate – You, the individual or organization promoting the merchant’s offerings.
  3. The Customer – The end user who purchases the product or service through the affiliate’s efforts.

Affiliates earn commissions by successfully driving actions, such as sales or leads, for the merchant. For example, if you recommend a product like an online course on your blog, and a visitor clicks on your affiliate link to purchase it, you receive a percentage of the sale as a reward.

This model is popular for its simplicity and effectiveness. For businesses, it’s a cost-efficient way to expand their customer base without upfront advertising costs. For affiliates, it’s a lucrative opportunity to monetize their content, whether through blogs, social media, or other platforms.

Affiliate marketing thrives because it creates a win-win scenario: businesses gain increased visibility and sales, while affiliates are rewarded for their promotional efforts. This synergy is what makes affiliate marketing a key player in today’s digital economy.

How Does Affiliate Marketing Work?

Affiliate marketing operates on a simple and effective model. Affiliates promote a company’s product or service and earn commissions based on completed actions, such as sales, leads, or visits.

Affiliate Marketing Process

Here’s how it works step by step:

  • Sign Up for an Affiliate ProgramAffiliates join a company’s affiliate program and receive unique tracking links. These links monitor the traffic, sales, or actions generated through the affiliate’s marketing efforts.
  • Promote the Products or ServicesAffiliates use various platforms—such as blogs, websites, newsletters, or social media—to promote the company’s offerings. The goal is to drive traffic through the affiliate link to encourage conversions.
  • Earn CommissionsEvery time a user completes a desired action (such as purchasing a product or signing up for a service) through the affiliate’s link, the affiliate earns a commission.

For example, joining the Amazon Affiliate Marketing Program allows you to earn $200 per sale and $10 for every free trial sign-up made through your referral link.

Benefits of Affiliate Marketing

Affiliate marketing offers numerous advantages that make it an appealing venture for beginners and experienced marketers a like:

Benefits of Affiliate Marketing

  1. Low Barrier to Entry

    • You don’t need to create or own a product.
    • Simply promote existing products and earn a commission for each successful referral.
    • It’s as easy as selecting a product, sharing a referral link, and earning income when sales occur.
  2. Low Cost and Risk

    • There’s no need for product development, inventory management, or substantial upfront investment.
    • Your primary investment is time and effort. If a product isn’t resonating with your audience, you can quickly switch to promoting another without incurring significant losses.
  3. Easily Scalable

    • Affiliate marketing allows you to reach a global audience.
    • By diversifying your portfolio and promoting multiple products, you can attract a broader audience.
    • Optimizing your content and strategies helps scale your income as your reach expands.
  4. Passive Income

    • Once your promotional content is created, it can continue to generate income over time.
    • While it’s not a quick-money scheme, consistent effort can lead to a steady passive income stream.
  5. Work From Anywhere

    • Flexible working hours and location.
    • All you need is internet access and your platform.

Types of Affiliate Marketing

There are three primary models of affiliate marketing: unattached, related, and involved.

  1. Unattached Affiliate Marketing

    • This is a low-commitment model where the affiliate has no personal connection to the product or niche.
    • Affiliates often use paid ads (e.g., PPC campaigns) to direct traffic to their links without endorsing the product.
    • Example: Running ads for a fitness gadget without ever using it yourself.
  2. Related Affiliate Marketing

    • Affiliates have knowledge or authority in the product’s niche but don’t use the product themselves.
    • This model benefits from audience trust since the affiliate is seen as an expert in the field.
    • Example: A fitness blogger promoting nutritional supplements relevant to their audience.
  3. Involved Affiliate Marketing

    • Affiliates personally use and endorse the product or service.
    • This approach builds the highest level of trust and often results in better conversion rates.
    • Example: A tech reviewer testing a gadget and sharing a detailed review to influence purchasing decisions.

    For long-term success, focusing on related and involved affiliate marketing can lead to stronger audience trust and higher earnings potential.

How to Make Money with Affiliate Marketing

Affiliate marketing is one of the simplest and most profitable ways to generate passive income online. By promoting products or services and earning a commission for every sale made through your unique links, you can turn your online presence into a revenue stream. Here’s a step-by-step guide to help you get started with affiliate marketing and make it work for you.

How to Make Money with Affiliate Marketing

  1. Choose Your Niche

    Your niche is the specific area or topic you’ll focus on when creating social media content and promoting products. Choosing the right niche is critical for standing out in today’s competitive landscape.

    • How to Find Your Niche

      • Passion: What topics excite you the most? Writing about what you love keeps you motivated.
      • Expertise: What are you knowledgeable about or willing to learn?
      • Audience Demand: What are people searching for? Use tools like Google Trends or a Google Trends alternative to identify trending topics.
      • Profitability: Does this niche have products with affiliate programs?

    For example, instead of a broad category like “fitness,” narrow it down to “home workout routines for beginners.” A focused niche helps you build a loyal audience and improves your chances of ranking in search engines.

  2. Decide on a Content Platform

    Affiliate marketing works on various platforms, including:

    • Websites or Blogs (recommended for long-term growth and SEO)
    • YouTube Channels (great for tutorials and reviews)
    • Social Media Platforms (Instagram, TikTok, etc.)
    • Email Newsletters (perfect for building a community and sharing updates)

    We recommend starting with a website and using SEO to drive organic traffic. A well-optimized blog can provide consistent, passive traffic over time.

  3. Join Affiliate Programs

    Affiliate advertising programs come in various forms. Here’s a breakdown:

    1. High-paying, low-volume programs – Products like software or services with high commissions but fewer buyers.
    2. Low-paying, high-volume programs – Products with broad appeal, like Amazon Affiliates, which pay smaller commissions but offer high sales potential.
    3. High-paying, high-volume programs – Popular, expensive products like credit cards, though these often attract experienced marketers.

    To find the best affiliate marketing programs, search for brands in your niche or analyze competitors. Tools like Ahrefs can help identify what programs they’re using. If you can’t find a program for a product you love, reach out to the company directly.

  4. Create High-Quality Content

    Content is the backbone of affiliate marketing. To succeed, your content must solve problems and add value. Here are a few examples of content types that work well:

    • Product Reviews: Test products and share your honest experience.
    • How-To Guides: Provide actionable advice that integrates affiliate links naturally.
    • Comparisons: Help your audience choose between similar products.

    For instance, if you’re reviewing “the best social media management tools for businesses,” ensure you’ve tested the tools and provide detailed insights into their pros and cons. Authenticity builds trust, leading to more clicks and conversions.

  5. Drive Traffic to Your Content

    Creating great content is only half the battle—you also need to bring visitors to your platform. Here are three proven strategies:

    • A. SEO (Search Engine Optimization)

      SEO involves optimizing your website to rank higher on search engines. Focus on:

      • Keyword Research: Use tools like SEMrush or Ahrefs to target popular search terms.
      • On-Page Optimization: Write meta titles, descriptions, and headings with relevant keywords.
      • Link Building: Gain backlinks from reputable websites to boost your domain authority.
    • B. Social Media Marketing

      Promote your content on platforms like Instagram, Facebook, and TikTok to attract targeted traffic.

    • C. Email Marketing

      Build an email list by offering something valuable, like a free guide, and use it to drive repeat visits to your content.

  6. Optimize Your Affiliate Links for Clicks

    Even the best content won’t succeed if readers don’t click on your affiliate links. Here are some tips:

    • Strategic Placement: Ensure links are visible but not intrusive.
    • Contextual Use: Mention the benefits of the product naturally within your content.
    • Callouts: Use buttons or comparison tables to make links stand out.
  7. Turn Clicks into Sales

    Once you get clicks, the final step is to ensure those clicks convert into purchases. Although the merchant controls the final sale, here’s how you can increase the likelihood of conversions:

    • Promote Reputable Products: Only recommend high-quality items you believe in.
    • Track Performance: Use tools like Google Analytics to monitor click-through and conversion rates.
    • Learn from Others: Study income reports from successful affiliate marketers to identify high-performing programs.

    Affiliate marketing is a fantastic way to earn passive income, but it requires effort, strategy, and patience. By choosing the right niche, creating valuable social media content, and optimizing your marketing efforts, you can build a sustainable affiliate business and achieve your financial goals.

    Start your affiliate marketing journey today and turn your passion into profit!

Best Affiliate Marketing Tools

Affiliate marketing tools help businesses and marketers manage their affiliate programs effectively, track performance, and boost conversions and engagement. Here are some top categories of tools and notable options for affiliate marketing:

  1. Affiliate Program Management Tools

    • Post Affiliate Pro: Manage affiliates, track referrals, and monitor commissions in one platform.
    • Tapfiliate: A cloud-based affiliate management tool offering integration with popular e-commerce platforms.
    • PartnerStack: Focuses on managing affiliate, reseller, and referral programs.
  2. Affiliate Networks

    • ShareASale: Connects affiliates with merchants and offers tools for tracking and reporting.
    • CJ Affiliate (formerly Commission Junction): One of the largest networks for finding and managing affiliate partnerships.
    • Rakuten Advertising: Combines affiliate marketing with advanced analytics and reporting.
  3. Link Tracking& Analytics Tools

    • Voluum: Advanced tracking and analytics for affiliate campaigns, including split testing.
    • ClickMeter: Tracks clicks, conversions, and affiliate links with ease.
    • Pretty Links: A WordPress plugin to create, track, and manage affiliate links.
  4. SEO& Content Marketing Tools

    • SEMrush: Find high-converting keywords and analyze competitors’ affiliate strategies from SEMrush.
    • Ahrefs: Analyze backlinks and search traffic to identify top affiliate opportunities from Ahrefs.
    • Grammarly: Improve the quality of affiliate content with real-time grammar and style suggestions.
  5. Email Marketing Tools

    • GetResponse: Combines email marketing with sales funnels to drive affiliate commissions.
    • AWeber: Focused on helping affiliates build email lists and send targeted campaigns.
    • ConvertKit: Ideal for bloggers and creators promoting affiliate products.
  6. Social Media Tools

  7. Affiliate Marketplace Tools

    • ClickBank: A platform for finding digital products to promote as an affiliate.
    • JVZoo: Specializes in software and digital products for affiliate marketers.
    • Impact: Connects affiliates and merchants with robust tracking and reporting.
  8. Landing Page& Conversion Optimization Tools

    • Unbounce: Create optimized landing pages for affiliate offers.
    • ClickFunnels: Build sales funnels specifically designed for affiliate marketing.
    • Instapage: Easy-to-use landing page builder with A/B testing capabilities.
  9. Payment Processing Tools

    • Payoneer: Widely used by affiliates for receiving international payments.
    • Wise (formerly TransferWise): Offers affordable international money transfers for affiliate commissions.
    • Stripe: Secure payment processing for affiliate program payouts.
  10. Compliance& Fraud Prevention

    • Everflow: Advanced fraud detection and affiliate program management.
    • TUNE: Tracks fraud and ensures compliance within affiliate campaigns.
    • Fraudlogix: Focuses on preventing fraudulent activity in affiliate marketing.

Choosing the Right Tools

The best tools for you depend on the size of your affiliate program, the channels you use, and your specific needs (e.g., tracking, payments, or content creation). Would you like me to recommend tools tailored to your specific business goals?

Conclusion

Earning through affiliate marketing begins with understanding your audience’s needs and identifying high-paying products that align with their interests. By creating engaging, high-quality content, you can attract the right audience to your site and guide them toward your affiliate offers.

Stick to the steps outlined in this guide and explore our additional resources to further master the art of making money with affiliate marketing.

Instagram Audio Download: Step-by-Step Guide

Scrolling through Instagram Reels can be a goldmine of inspiration, especially when you stumble upon an audio clip that sparks creativity or perfectly fits your upcoming content. But how do you save or download Instagram Reels audio for future use?

In this guide, we’ll explore several reliable methods to save or download Instagram Reels audio clips effortlessly. From practical tools to insider tips, we’ve got you covered with five foolproof tricks to help you access your favourite audio clips anytime. Stick around to discover a bonus hack that you won’t want to miss!

Can You Download Audio from Instagram Reels?

The Short Answer? Yes.

Instagram doesn’t provide an official way to download audio directly from Reels, but you can still get your hands on the sounds you love through some simple methods. Whether you’re a content creator looking to reuse an audio clip or just want to save your favorite tunes, there are ways to download or access that audio.

The Long Answer: Why Can’t You Download Audio Directly?

While it might seem like a simple feature to add, Instagram has decided not to offer a built-in option for downloading audio from Reels. This decision is likely due to copyright and licensing concerns, as the platform offers a wide range of copyrighted music for users to include in their videos. Instagram’s current focus is on allowing users to enjoy the audio within the app, but not necessarily give them direct access to download and use it outside the platform.

Why Download Audio from Instagram?

Downloading audio from Instagram serves multiple purposes, whether you’re a content creator, marketer, or casual user. Here’s why it matters:

  • Repurpose for Content Creation: Reuse trending audio clips in YouTube videos, podcasts, or Instagram reels.
  • Offline Access: Listen to your favorite audio without needing an internet connection.
  • Preservation: Save audio before it’s removed or becomes unavailable.

Using reliable tools, you can download Instagram reels or stories audio effortlessly and enhance your digital projects.

How to Download Audio from Instagram

Here’s how you can download audio from Instagram using simple steps:

  1. Choose a Reliable Instagram Audio Downloader: Select a trusted tool like SaveFrom.net or DownloadGram.
  2. Find the Audio Source: Identify the Instagram reel, story, or video with the desired audio.
  3. Copy the URL: Click the three-dot menu on the post and copy the link.
  4. Paste the Link: Go to the downloader tool, paste the copied URL, and initiate the download.
  5. Save the File: Choose the audio format and download it directly to your device.

These steps are quick and effective, whether you need to download Instagram reels audio or save background music from a story.

Best Instagram Audio Downloader Tools

Below is a detailed overview of tools to help you download audio from Instagram efficiently:

  1. SaveFrom.net

    SaveFrom.net is a versatile tool that supports Instagram reels download and audio extraction. With its simple interface, users can save audio files in MP3 format quickly.

    • Features: Multi-platform support, no installation required.
    • Formats Supported: MP3, MP4.
  2. 4K Video Downloader

    This 4K video downloader tool desktop application excels in downloading high-quality audio and video from Instagram. It’s ideal for users who prefer offline tools.

    • Features: HD audio support, user-friendly interface.
    • Formats Supported: MP3, MP4.
  3. DownloadGram

    DownloadGram is an online Instagram audio downloader with a fast and straightforward process for saving audio files.

    • Features: Web-based tool, no installation needed.
    • Formats Supported: MP3, MP4.
  4. Instadownload

    Instadownload is a reliable option for users looking to download Instagram audio quickly. It’s known for its intuitive design.

    • Features: Quick downloads, mobile-friendly.
    • Formats Supported: MP3.
  5. Viralpep

    Viralpep’s social media management tool includes robust features for managing, scheduling, and optimizing content. While not specifically an Instagram audio downloader, it’s an excellent tool for streamlining social media workflows.

Tool Comparison Table

Tool Key Features Supported Formats
SaveFrom.net Multi-platform, no installation MP3, MP4
4K Video Downloader Desktop app, HD support MP3, MP4
DownloadGram Web-based, simple process MP3, MP4
Instadownload Mobile-friendly, fast downloads MP3
Viralpep Social media management features N/A

How to Save Instagram Reels Audio to Use Later

If you want to use Instagram Reels audio in your own videos but prefer to stay within the app, Instagram makes it easy to save audio for later use. While you can download or extract audio using third-party tools, this method lets you manage everything directly from Instagram, keeping it simple and streamlined.

Guide on How to Save Instagram Reels Audio

Here’s how to save and access audio clips within the app:

  1. Step-by-Step Guide

    1. Find the Reel with the Audio You Want to Save: First, locate the Reel that features the audio you want to reuse in your own video. For example, let’s say you want to use an audio clip from Viralpep’s Reel (you can check out the specific example here).
    2. Save the Audio: Once you’ve found the Reel, tap the audio name at the bottom of the screen. This will take you to the audio’s page, where you can explore other Reels using the same sound.In the top right corner of the audio page, you’ll see a Save icon (it looks like a flag or bookmark). Tap this icon to save the audio to your account. Once saved, the icon will turn from a white outline to solid black, indicating that it’s been successfully added to your Saved collection.Tip: If you’re ready to create your video right then and there, you can also tap Use Audio to start recording immediately.
    3. Access Saved Audio: Now that your audio is saved, you can easily access it later. To do so, go to your profile and tap the hamburger menu (three horizontal lines) in the top right corner. From the menu, tap Saved.
    4. Navigate to the “Audio” Folder: In your Saved folder, you’ll find two main categories: “All Posts” and “Audio.” Tap on Audio to see all the sounds you’ve saved from Instagram Reels. You can scroll through your saved audio collection and tap on any track to view more details or start using it.
    5. Use Audio for Your Own Reels: When you’re ready to create your video, simply tap on the saved audio and then select Use Audio to add it to your Reel. You can either start recording or upload a pre-recorded video.
  2. Why Save Audio on Instagram

    Saving audio directly on Instagram has several benefits:

    • Convenience: You can keep a collection of audio clips you love, making it easier to plan and create future Reels without scrambling to find the right sound each time.
    • Organized Workflow: If you’re working on multiple Reels at once or brainstorming content ideas, saving audio keeps everything in one place, so you don’t lose track of great sounds.
    • Reusing Content: If you want to rework a previous audio clip in your next video, having it saved ensures you can quickly reuse it without searching again.

    This method is especially useful if you’re constantly looking for new audio tracks to inspire your Reels or if you’re putting together a content strategy for the upcoming weeks.

How to Use Downloaded Audio Creatively

After downloading audio from Instagram, here are some creative ways to use it:

  • Reels and Stories: Add saved audio to new Instagram reels or stories for better engagement.
  • YouTube Videos: Enhance your videos with popular audio clips.
  • Podcasts: Use downloaded audio as intros, outros, or background music.
  • Social Media Campaigns: Incorporate trending sounds into marketing campaigns.

Legal Guidelines for Downloading Instagram Audio

When downloading audio, follow these legal considerations:

  • Respect Copyright: Avoid using copyrighted audio without permission for commercial purposes.
  • Personal Use: Downloaded audio should be for personal use unless explicitly allowed.
  • Fair Use Doctrine: Understand fair use regulations to avoid legal complications.

Conclusion

Downloading Instagram audio opens up countless opportunities for content creators and casual users alike. Whether you’re repurposing sounds for projects or saving them for personal use, tools like SaveFrom.net, DownloadGram, and Viralpep simplify the process. Ready to explore the endless possibilities? Start using an Instagram audio downloader today to elevate your content!

FAQs

How can I download Instagram reel audio for free?

Use tools like SaveFrom.net or DownloadGram. Copy the reel’s URL, paste it into the tool, and download the audio.

Yes, for personal use. Commercial use requires permission from the copyright owner.

Which is the best Instagram audio downloader?

SaveFrom.net and 4K Video Downloader are top choices for reliability and quality.

Can I download Instagram reels and audio together?

Yes, tools like 4K Video Downloader allow simultaneous downloading of video and audio.

Are there mobile apps for Instagram audio download?

Yes, apps like InShot and 4K Video Downloader have mobile solutions.

Best Times to Post on YouTube for Views and Engagement

Creating successful videos on YouTube involves several key factors, including compelling titles, eye-catching thumbnails, strong YouTube SEO, and—most importantly—the quality of the content itself. With so much to consider, it can be challenging to determine what will truly resonate with your audience.

However, one aspect that can significantly impact your video’s success is timing. Through the analysis of over a million YouTube videos, we’ve gathered valuable insights into one critical factor: the best time to post on YouTube.

While this isn’t a guaranteed formula for viral success—since elements like content quality and SEO play substantial roles—posting your videos at the right time can give them a better chance to shine. It’s a simple yet effective step to help maximize your content’s visibility and engagement.

In this blog, we’ll explore the best times to upload YouTube videos, backed by data and audience behavior trends. Additionally, we’ll guide you on how to post a video on YouTube and identify the optimal posting schedule tailored to your audience, whether you’re a business, a casual content creator, or a full-time YouTuber.

The Best Time to Post on YouTube

Based on our analysis, the best time to post on YouTube videos is Friday between 3 p.m. and 4 p.m. Videos uploaded during this window tend to receive the highest views. Other peak times include Tuesday at 2 p.m. and Thursday at 6 p.m.

Audience behavior on YouTube follows a fairly predictable pattern. According to Statista, a significant portion of YouTube users are working-age adults, with 21% of male users and 17% of female users falling between 25 and 44 years old. This demographic trend influences when users are most active on the platform.

During weekdays, viewership is generally lower in the early morning hours, increasing steadily mid-morning, during lunch breaks, and peaking in the late afternoon and evening. Interestingly, there are also some late-night hot spots, such as 11 p.m. on Mondays and Thursdays. Viewership typically rises as the week progresses, reaching its peak on Fridays before declining over the weekend.

Conversely, the worst times to post on YouTube are between 1 a.m. and 6 a.m. when most viewers are asleep. Other low-traffic periods include early Monday mornings (4 a.m. to 5 a.m.), Saturday mornings at 8 a.m., and Sunday evenings at 9 p.m.

While YouTube stands out from other platforms like Instagram, Facebook, TikTok, and LinkedIn with a distinct peak posting time, there are still other favorable times throughout the week that shouldn’t be overlooked. Let’s take a closer look at the best times to post a Youtube video each day:

  • Monday: 5 p.m.
  • Tuesday: 2 p.m.
  • Wednesday: 9 a.m.
  • Thursday: 6 p.m.
  • Friday: 3 p.m.
  • Saturday: 4 p.m.
  • Sunday: 11 a.m.

These insights, backed by research, confirm that YouTube users are most active outside regular working hours, making these time slots optimal for maximizing your content’s visibility and engagement.

  1. Best Time to Post on YouTube on Monday

    For maximum engagement on Monday, aim to post your video by 5 p.m. The next best times are 12 p.m. and 7 p.m. when views also tend to peak.

    Peak Time for Views on Monday: 5 p.m.

    Recommended Content Types: Start the week with something engaging like tutorials, vlogs, or trending topics. People are gearing up for the week and looking for content to wind down after work.

  2. Best Time to Post on YouTube on Tuesday

    On Tuesday, aim for 2 p.m. as the peak time to post, followed by 8 p.m. This time frame offers excellent opportunities for audience engagement, similar to Friday’s peak hours.

    Peak Time for Views on Tuesday: 2 p.m.

    Recommended Content Types: Educational videos, explainer videos, and Q&A sessions work well, as audiences tend to be more receptive to content that adds value mid-week.

  3. Best Time to Post on YouTube on Wednesday

    The best time to post on Wednesday is 9 a.m., with 2 p.m. and 6 p.m. also showing significant engagement.

    Peak Time for Views on Wednesday: 9 a.m.

    Recommended Content Types: Mid-week, audiences are looking for inspiration. Share motivational content, reviews, or entertainment pieces that are easy to digest.

  4. Best Time to Post on YouTube on Thursday

    Thursday’s peak posting time is 6 p.m., followed by 3 p.m. and 8 p.m. for optimal reach.

    Peak Time for Views on Thursday: 6 p.m.

    Recommended Content Types: People are gearing up for the weekend, so content related to “weekend prep,” reviews, or trend-based content tends to perform well.

  5. Best Time to Post on YouTube on Friday

    Friday stands out with 3 p.m. being the top time for posting, followed by 9 p.m., both of which draw the most views for the week.

    Peak Time for Views on Friday: 3 p.m.

    Recommended Content Types: Release content related to weekend activities, such as “weekend plans,” “best of the week” lists, or casual, fun videos that align with viewers’ leisure time.

  6. Best Time to Post on YouTube on Saturday

    Though Saturdays tend to be quieter on YouTube, the optimal time to post is between 3 p.m. and 5 p.m.

    Peak Time for Views on Saturday: 4 p.m

    .Recommended Content Types: Focus on light-hearted or highly engaging videos like social media marketing challenges, DIYs, or funny clips, as these are more likely to be shared and enjoyed on a more relaxed day.

  7. Best Time to Post on YouTube on Sunday

    Sunday is the slowest day, but uploading at 11 a.m. can yield the highest views, followed by 2 p.m. and 3 p.m.

    Peak Time for Views on Sunday: 11 a.m.

    Recommended Content Types: Offer relaxing or reflective content such as week-in-review videos, relaxation techniques, or lifestyle tips that help viewers wind down and prepare for the upcoming week.

The Optimal Times to Post YouTube Shorts

Timing plays a crucial role in maximizing the reach and engagement of your YouTube Shorts. Based on insights from a comprehensive dataset, the best time to post YouTube Shorts is on Friday between 3 p.m. and 4 p.m.. Other highly effective time slots include:

  • Thursday at 6 p.m.
  • Tuesday at 2 p.m.

Why Timing Matters

This data reflects the viewing patterns of YouTube audiences, ensuring that your content gets the attention it deserves when activity on the platform is at its peak. Notably, this dataset analyzed the median views of all YouTube videos—both Shorts and long-form—making these findings relevant regardless of the format you’re using.

By strategically posting your YouTube Shorts during these high-engagement windows, you can boost visibility, increase views, and attract more subscribers to your channel.

Finding the Best Time to Post YouTube Videos and Shorts

Every audience is unique, and while there are general guidelines for the best time to upload to YouTube, these may not always align with your audience’s preferences. To maximize views on YouTube, you need to tailor your posting schedule based on your audience’s behavior.

Fortunately, YouTube Analytics provides powerful tools to help you determine the best time to post a YouTube video.

Best Time to Post YouTube Shorts and Video

Here’s a step-by-step guide to finding your ideal time slots.

  1. Access YouTube Studio

    To get started, head over to YouTube Studio. The easiest way to access it is by going directly to studio.youtube.com.

    If you’re new to YouTube Studio, it’s worth taking the time to familiarize yourself with its features. Think of it as the control center for your channel. Here, you can:

    • Upload videos and Shorts.
    • Monitor your subscribers and comments.
    • Manage monetization.
    • Track video performance.
  2. Explore Your Analytics

    Once inside YouTube Studio, navigate to the Analytics tab in the left-hand menu. You’ll land on the Overview page, where you can access detailed insights into your channel’s performance, including:

    • Total viewership and watch time.
    • Subscriber growth.
    • Engagement metrics.

    Make it a habit to check your analytics regularly—it’s one of the best tools for optimizing your content strategy.

  3. Navigate to the Audience Tab

    Now, let’s dig deeper into your audience data. Click on the Audience tab at the top of the Analytics page. This section provides valuable insights, including:

    • Audience demographics (age, location, gender).
    • The type of content your viewers engage with (videos, Shorts, or Lives).
    • Insights into which videos are helping you grow your audience.

    For identifying the best time to post on social media, scroll down to the “When your viewers are on YouTube” graph.

  4. Analyze the ‘When Your Viewers Are on YouTube’ Graph

    The heat map in this section is your key to understanding audience activity. Here’s how to interpret it:

    • Dark purple blocks: These indicate the times when your audience is most active on YouTube.
    • Light purple blocks: Represent times of lower audience activity.

    For example, if your audience is most active between 4 p.m. and 5 p.m. on Mondays and 5 p.m. to 6 p.m. on Tuesdays, those time slots are prime opportunities for posting your videos.

    Keep in mind that this data is based on the past 28 days and is updated in real time, so it’s essential to monitor it periodically to account for shifts in audience behavior.

  5. Fine-Tune Your Posting Strategy

    Using this data, you can develop a posting schedule that aligns with your audience’s habits. If you post videos on YouTube when your audience is most active, your content is more likely to appear on their homepages, resulting in higher engagement.

    Additionally, if you’re experimenting with Shorts or Live videos, you can apply the same data to determine when your audience is more likely to interact with these formats.

    By consistently analyzing your metrics and adapting to your audience’s preferences, you’ll be well on your way to growing your YouTube channel effectively.

Ultimate Checklist for Creating High-Performing YouTube Videos and Shorts

While posting at the right time can give your YouTube channel a boost, it’s only part of the equation. For sustained growth and success, you’ll need to focus on a variety of factors.

Checklist for Creating YouTube Videos

Use this comprehensive checklist to ensure your YouTube videos and Shorts are optimized for maximum social media impact:

  1. Polish Your Channel

    • Invest in high-quality channel art, including a profile picture, banner image, and video watermark.
    • Write a detailed channel description that highlights your niche and value.
    • Create a standout channel trailer or spotlight video to introduce new viewers to your content.
  2. Understand the YouTube Algorithm

    YouTube’s algorithm determines how content is shown to viewers based on metrics like watch time, engagement, and views. Learn how the algorithm works to increase the visibility of your videos and Shorts.

  3. Master YouTube SEO

    • Conduct keyword research and incorporate those terms into your video titles, descriptions, and tags.
    • Optimize your channel description and playlists to improve discoverability.
    • Treat your video descriptions like mini-blog posts, including keywords naturally.
  4. Create Eye-Catching Thumbnails

    • Use bright, high-contrast colors and bold text to grab attention.
    • Include faces and emotions in thumbnails to connect with viewers.
    • Maintain consistent branding across your thumbnails for a polished look.
  5. Capture Attention Immediately

    • Skip long introductions and dive straight into the core content.
    • Clearly deliver on the promises made in your video title and thumbnail.
  6. Incorporate Pattern Interrupts

    Avoid monotony in your videos with dynamic edits, such as:

    • Text overlays, transitions, and animations.
    • B-roll footage and visual effects to maintain viewer engagement.
  7. Develop Video Series

    Turn successful videos into ongoing series. Regular installments give your audience a reason to return and stay engaged with your channel.

  8. Leverage YouTube Shorts

    With over 70 billion daily views, Shorts can help you reach new audiences. Focus on creating snackable, engaging content and explore creative ideas to draw in subscribers.

  9. Post Consistently

    Establish a regular posting schedule. Platforms like YouTube reward creators who maintain consistency, so use a social media content calendar to stay organized and on track.

  10. Engage With Your Community

    • Reply to and like viewer comments to foster relationships.
    • Highlight audience comments in your videos for added engagement.
    • Encourage discussions by asking questions and moderating comments to keep your community positive.

How to Post Video on YouTube: Wrapping Up

Video marketing is no easy task. The immense effort and time required to produce and export a single video can be overwhelming.

That’s why it’s essential to explore every strategy that can help your hard work get the recognition it deserves — including how to post a YouTube video at the right time.

By leveraging the methods shared above and insights from our study of over 50,000 YouTube accounts, you’ll be able to pinpoint the optimal times to post both YouTube Shorts and long-form videos.

Take inspiration from the general peak times, dive into your audience data using YouTube Analytics, and kickstart a well-planned YouTube marketing strategy.

However, remember that timing is just one piece of the puzzle. It gives you an edge, but the true game-changer is delivering high-quality, engaging content that resonates with your audience.

For even better results, use social media management tools like Viralpep to schedule your YouTube videos and Shorts seamlessly and enhance your YouTube marketing performance.

How to Schedule Instagram Posts for Maximum Impact

Instagram has become an indispensable tool for businesses, influencers, and content creators aiming to grow their online presence. However, posting consistently at the right time can be challenging, especially with a busy schedule. This is where learning how to schedule Instagram posts can make a significant difference. By automating Instagram posts, you can save time, maintain a consistent posting schedule, and reach your audience when they’re most active.

Using an Instagram scheduler also frees up your day for critical tasks like community engagement, performance analysis, and strategy development—all without the hassle of staying up late or waking up early to post for an international audience.

Given that nearly 38% of social media teams consist of just one person, learning how to schedule a post on Instagram is an invaluable tool for managing time effectively and maximizing impact.

In this guide, we’ll explore actionable steps on how to schedule a post on Instagram, the tools you can use, and why scheduling is a game-changer for your social media strategy. Let’s dive in!

Can You Schedule Instagram Posts in Advance?

The short answer? Absolutely, yes! Instagram offers multiple ways to schedule Instagram posts in advance, making it easier than ever to stay consistent and efficient with your content strategy. Whether you’re a busy social media manager or a solo entrepreneur, scheduling tools can streamline your workflow and free up time for other impactful tasks.

Interestingly, data shows that posting twice a week on Instagram achieves the highest engagement rate of 5.6%. This highlights the importance of consistency in maintaining an active and engaging presence on the platform.

  1. Methods for Scheduling Instagram Posts

    Here are three effective ways to schedule Instagram posts:

    1. Instagram’s Native Scheduling Feature: Instagram itself now offers a built-in scheduling option for Business and Creator accounts. This feature allows you to plan and queue posts directly within the app, ensuring they go live at the perfect time without any extra tools.
    2. Meta Business Suite: If you manage multiple social media accounts, Meta Business Suite is a powerful tool. It lets you schedule Instagram posts and manage other platforms simultaneously, giving you a centralized space for all your content planning.
    3. Social Media Scheduling Tools: Advanced scheduling tools like Viralpep are revolutionizing social media management. These tools not only enable you to automate Instagram posts but also offer analytics and collaboration features to optimize your social media strategy.
  2. Why Scheduling Matters for Brands

    Scheduling Instagram posts isn’t just about saving time—it’s about focusing your energy on what truly matters. According to a Social Media Productivity report, 63% of marketers say manual tasks hinder their ability to perform high-impact work. However, 59% report gaining extra time by using the right social media management tools.

    When you eliminate the hassle of manual posting and forget about setting alarms for peak engagement times, you can dedicate more time to creating original, compelling content and fostering genuine connections with your audience.

    Pro Tip: Scheduling is only available for Instagram Business or Creator accounts. If you’re still using a personal account, switch over to unlock these valuable features!

How to Schedule Instagram Posts Using the Instagram App

Instagram finally delivered what users had been requesting for years—in-app scheduling! Introduced in late 2022, this feature allows you to plan and schedule posts on Instagram up to 25 posts per day and as far as 75 days in advance, making it a game-changer for content creators and social media managers.

  1. Who Can Use This Feature

    Before you dive in, remember that in-app scheduling is only available for Instagram Business and Creator accounts. Unfortunately, personal accounts don’t have access to this functionality. If you’re using a personal account, consider upgrading to unlock the scheduling feature.

  2. Step-by-Step Guide to Scheduling Instagram Posts

    Follow these simple steps to schedule a post on Instagram or Reels directly within the Instagram app:

    1. Open the Instagram App: Launch the app and tap the + icon at the bottom of your screen, or swipe right on your home feed to start creating a new post.
      Open Instagram App
    2. Choose Your Content Type: Select whether you’re creating a Post or a Reel.
      Select Instagram Content Type
    3. Create or Upload Your Content:
      • Use the in-app camera to take a photo or record a video.
      • Alternatively, upload a pre-prepared image or video from your device’s camera roll.

      Upload Instagram Content

    4. Edit and Add Your Details
      • Apply filters, effects, or stickers as needed.
      • Add a compelling caption and any relevant hashtags.

      Edit Instagram Post

    5. Access Advanced Settings: Scroll to the bottom of the screen and tap More Settings.
      Click on More Options
    6. Toggle Scheduling On:
      Enable the Schedule this Post option, then select your desired date and time for the post to go live.
      Toggle Scheduling On
    7. Schedule Your Post: Navigate back to the previous screen and tap Schedule to finalize your post.
      Choose Schedule Post
  3. Revising Scheduled Posts

    Need to make changes to a post you’ve already scheduled? No problem! Here’s how:

    1. Go to your Instagram profile and tap the menu icon (three horizontal lines) in the top-right corner.
      Click on the Menu Icon
    2. Select Scheduled Content from the menu.
      Select Schedule Content Option
    3. Find the post or Reel you want to edit, then tap the three dots next to it.
      Find the Schedule Post
    4. From here, you can edit, reschedule, share immediately, or delete the post.
      Edit Delete Share Now Instagram Post
  4. Important Notes About Instagram’s Native Scheduler

    • Limits: You can schedule a maximum of 25 posts per day and up to 75 days in advance.
    • No Cross-Posting: The in-app scheduler doesn’t support cross-posting to Facebook, Threads, or other platforms. If cross-posting is important to you, consider using tools like Viralpep to streamline the process.
    • No Stories Scheduling: Currently, this feature is limited to posts and Reels. To schedule Stories, you’ll need to use third-party scheduling tools like Viralpep.

By utilizing Instagram’s native scheduling feature, you can plan your content strategically and ensure it reaches your audience at the optimal times—all without the hassle of manual posting.

How to Schedule Instagram Posts Using Meta Business Suite

Meta Business Suite provides a seamless way to schedule Instagram posts and manage your social media strategy more effectively. Before you get started, ensure your Instagram Business Account is linked to your Facebook Page to unlock this feature.

  1. Step-by-Step Guide to Scheduling Instagram Posts

    Follow these steps to schedule posts on Instagram through Meta Business Suite:

    1. Open Meta Business Suite: Navigate to your Facebook Page and select Meta Business Suite from the menu on the left-hand side.
      Click on Meta Business Suite
    2. Create a New Post or Reel: Click on Create post or Create reel from the Home tab. Alternatively, you can find this option under Content or Planner in the navigation menu.
      Click on Create Post
    3. Select Your Instagram Account: In the Post to section, choose the Instagram account you want to share your content to. You can also select your Facebook Page if you’d like to cross-post the content.
      Select Your Instagram Account
    4. Upload and Customize Your Content:
      • Add your media, such as images or videos.
      • Write your caption, including mentions and hashtags.
      • If needed, geotag a location to enhance your post’s visibility.

      Add Content and Photo

    5. Schedule Your Post:
      • Click on Schedule and set your preferred date and time.
      • Use the Active times feature to view recommendations on when your audience is most active.

      Schedule Your Post

    6. Save and Finalize: Once you’ve set the date and time, click Save, then hit Schedule to confirm.
  2. Managing Scheduled Posts

    You can find all your scheduled posts under the Content section in the Posts and Reels tab in the left sidebar. Here, you can:

    • Edit your scheduled posts.
    • Reschedule or publish them immediately.
    • Delete posts if needed.
  3. Why Use Meta Business Suite

    Meta Business Suite offers the convenience of managing Instagram and Facebook content from a single platform. It’s ideal for those who want to save time without relying on third-party tools.

    However, if you’re managing multiple platforms beyond Instagram and Facebook or need additional features, third-party tools like Viralpep can simplify your workflow even further.

How to schedule Instagram posts using Viralpep

When managing a larger social media strategy across multiple platforms, a dedicated tool like Viralpep can simplify your workflow. Beyond basic scheduling, Viralpep enables cross-platform posting, team collaboration, permission management, and robust analytics.

With Viralpep, you can schedule various Instagram content types, including:

  • Single image or video posts
  • Reels
  • Carousel posts
  • Stories

Additionally, Viralpep’s post preview allows you to visualize how your Instagram post will look with your scheduled post. Viralpep streamlines the process, so you can focus on creating engaging content.

  1. Sign in to Your Viralpep Account

  2. Connect Your Instagram Account

    • Navigate to the Accounts section and connect your Instagram profile.
    • Grant the necessary permissions to ensure seamless integration.

    Click on Account Section

  3. Create a New Post

    • Go to the Dashboard and click on the Create Post button.
    • Select Instagram as the platform.

    Click on the Create Post Button

  4. Add Content

    • Upload the photo or video you want to post.
    • Write an Instagram engaging caption, including hashtags and tags if needed.
    • Add emojis and mentions to make your post more interactive.

    Add Content

  5. Customize Posting Time

    • Choose the Schedule for Later option.
    • Pick a date and time for your post to go live.

    Choose the Schedule for Later

  6. Use Additional Features

    • Preview your post to ensure it looks perfect.
    • If you’re posting a carousel or reel, ensure your file formats meet Instagram’s requirements.

    Preview the Post

  7. Save and Schedule

    • Click on the Schedule button. Viralpep will handle the rest, ensuring your post goes live at the scheduled time.

    Click on the Schedule Button

  8. Benefits of Using Viralpep

    • Cross-Platform Management: Schedule social media content for Instagram, Facebook, TikTok, LinkedIn, Pinterest, and more—all from a single dashboard.
    • Team Collaboration: Assign tasks, manage permissions, and work seamlessly with your team.
    • Advanced Analytics: Access in-depth metrics to track performance and refine your strategy.

Viralpep goes beyond just Instagram scheduling by empowering brands to streamline their entire social media workflow, saving time and maximizing engagement impact.

Why Scheduling Instagram Posts in Advance is a Game-Changer

Scheduling your Instagram posts in advance with Viralpep offers several advantages for social media marketers and businesses alike. Here’s how planning your content ahead can make a difference:

  1. Save Time and Boost Efficiency

    Using Viralpep, you can streamline your workflow by scheduling all your Instagram posts in one go. This eliminates the need for last-minute posts, giving you more time to focus on crafting engaging visuals and captions. With a few clicks, your content is ready to go live when your audience is most active.

  2. Ensure Consistency in Posting

    Consistency is crucial for maintaining an active presence on Instagram. Viralpep helps you stick to a regular posting schedule, ensuring your followers always have fresh, engaging content to interact with.

  3. Increase Productivity

    Batch-scheduling your posts in advance with Viralpep means you can work smarter, not harder. Instead of daily uploads, plan your content calendar ahead of time to align with marketing goals and engagement trends.

  4. Get Timely Approvals

    For businesses with multi-level approvals, scheduling Instagram posts in advance allows stakeholders to review and approve content without any rush. Viralpep’s collaborative platform makes it easy for teams to stay aligned on the content pipeline.

  5. Better Strategic Planning

    Planning your posts ahead lets you take a step back and develop a more cohesive strategy. By analyzing engagement trends through Viralpep’s analytics tools, you can create posts that resonate with your audience and achieve better results.

Best Practices for Scheduling Instagram Posts with Viralpep

Using Viralpep, you can make the most out of Instagram scheduling with these expert tips:

Best Practices for Scheduling Instagram Posts

  1. Schedule Posts at the Right Time

    Timing is everything when it comes to social media engagement. Viralpep’s advanced social media analytics tool help you determine the best times to post based on your audience’s activity. This ensures your posts go live when your followers are most likely to engage.

  2. Plan Content Ahead of Time

    A solid content plan is the backbone of a successful Instagram strategy. Viralpep’s user-friendly scheduler lets you plan and visualize your posts in advance, ensuring a balanced mix of promotional, informational, and engaging content.

  3. Curate High-Quality and Relevant Content

    Quality over quantity is key on Instagram. Use Viralpep to curate visually appealing, relevant content that resonates with your audience. Incorporate engaging captions, strategic hashtags, and mentions to maximize reach and engagement.

  4. Maintain Flexibility for Last-Minute Changes

    The social media landscape changes quickly, and Viralpep allows you to adjust or pause scheduled posts for Instagram easily. Whether a new trend emerges or a crisis requires a change in strategy, you can adapt without disrupting your workflow.

  5. Analyze and Optimize Performance

    Leverage Viralpep’s in-depth analytics to track the performance of your scheduled posts on Instagram. Understand what works, identify gaps in your content strategy, and double down on posts that drive the most engagement.

Conclusion: Take Control of Your Instagram Strategy

Scheduling Instagram posts can revolutionize your social media marketing strategy by saving time and ensuring consistency. With tools like Viralpep, you can automate Instagram posts, track their performance, and focus on creating meaningful interactions with your audience. Ready to elevate your Instagram game? Start scheduling today and watch your engagement soar!

By scheduling posts on Instagram, you can make the most of your content, reduce the stress of daily posting, and ensure that your business or brand remains active and visible on the platform. The power to manage and organize your content is in your hands—start scheduling now and experience the benefits firsthand!

Viral Videos vs. Evergreen Content: What’s the Right Choice in 2025?

Content creation is no longer just about creating assets that are optimized to engage with the audience and invoke emotions. It’s also about jumping on trends, persistence, and connecting with individuals to build authentic relationships.

In a recent Fobes column, Electrify Video Partners CEO Ian Shepherd opined that we’re currently in a “golden age of content creators,” thanks to a heady mix of diverse monetization channels, global accessibility, and AI-powered tools reducing barriers to entry.

However, these factors also lead to stiff competition, with marketers and creators constantly striving to produce videos with the potential to capture attention in a crowded space. At this point, we often struggle to choose between viral content and evergreen content.

Viral videos that achieve rapid popularity and widespread sharing often overshadow their evergreen counterparts, which remain relevant for the long haul. Both have pros and cons, and a balance between them is the key to an effective marketing strategy.

In this article, we will compare these two types of content and explain the right mix for 2025 and beyond.

Why Everyone Wants to Go Viral

Popularity is the primary reason for brands and individuals seeking virality. According to Statista, memes, comedy, and viral videos combined to be the second most popular category of video content in the first quarter of 2024. Nearly 35% of online users watched these videos, only trumped by music videos that took 50% of the reach share.

Further, instant awareness and visibility are the benefits of viral videos. A single viral hit can propel a brand into the spotlight. The Sky High Mascara Express campaign did it for Maybelline last summer, garnering 67.2 million views, 2.4 million likes, and over 19,000 comments on Instagram.

viral video in the train

Videos often go viral because they resonate emotionally with audiences, with the added benefit of forging a stronger connection with consumers and improving brand recall. If your video content manages to go viral on social media, chances are good that people will start to recognize your brand instantly.

  1. Risks of Focusing Only on Viral Videos

    While viral videos can serve as brand awareness catalysts, there are some risks of relying exclusively on them. A short shelf-life is the primary concern, as viral content often has a fleeting relevance. Viewer interest may vanish into thin air once the trend fades.

    Viral content is also hard to repurpose, rendering it useless for future marketing efforts. A business that spends thousands of dollars on these campaigns may not build a sustainable marketing asset.

    Another downside is that viral videos may have limited effectiveness for lead generation, even if they can attract views. The wider the appeal, the less focused your videos will be on addressing the needs of your niche audience.

  2. Tips to Create Videos that Go Viral

    A Search Engine Journal article suggests that the odds of a video going viral are shockingly low at 3,192 to one. The numbers show how challenging creating such videos can be. You can follow these tips to create ones with the potential to go viral.

    First up, feeding the social platforms’ newsfeed algorithms requires rapid iteration on multiple ideas. It’s generally a good idea to experiment with various concepts to see what resonates with your audience. Using LTX Studio for storyboard prototypes, you can transform a rough concept into a visual story with the help of AI. Quick visualization of your concepts can help you decide on what gives you the best chances to achieve your virality goals.

    ltx studio for storyboard

    LTX Studio developers Lightricks estimate that using the app makes for 200% faster creative iterations and 300% faster team collaboration flows.

    Secondly, make sure you stay updated on industry trends relevant to your audience. Being an early adopter of trends gives you a better chance of creating viral content.

    Also, simply creating great video content does not guarantee that it will become viral. You can add a secret sauce by collaborating with influencers to further diversify creative input, also amplifying reach and credibility.

    Content formats can be a game-changer when it comes to virality. Focus on short-form content like Reels, TikToks, and Stories as they are tailored to win. The reason is clear: shorter attention spans make bite-sized pieces more attractive to viewers. We at Viralpep recommend diving deep into data to analyze content performance, understand engagement trends, and design a strategy accordingly.

    viralpep dashboard

Why Evergreen Content Makes Sense

Evergreen content, like evergreen pines and firs, stays green all year round. In the language of content strategy, these are the pieces that remain fresh and useful over a long period of time. The best options for YouTube evergreen content include educational videos, instructional videos, travel videos, biographies of famous people, and overviews of holiday traditions.

The long-lasting impact is perhaps the best benefit of evergreen content as it continues to attract viewers and provide sustained traffic. Additionally, consistent delivery of valuable information through such pieces establishes a brand as a niche authority.

Since evergreen topics often align with customer needs throughout their journey, they also have better lead generation and nurture potential. What’s more, these assets are easy to update and repurpose into different formats without compromising relevance.

The cost of creating a video with a semi-pro team has been estimated to range between $1,500 and $3,000 per minute. Hiring a professional video marketing company means spending between $5,000 and $20,000 per minute. While it’s certainly possible to create videos without hiring a proper production team, these benchmarks are certainly eye-opening when it comes to the relatively high threshold on video content ROI, and evergreen videos have the most potential to drive business value impact over time.

  1. Limitations of Evergreen Videos

    Apart from the benefits, evergreen content also has its drawbacks. Creating it requires intensive research and planning. Marketers need to dig deep into audience expectations and market trends to ensure relevance for the long haul.

    When compared with viral videos, evergreen ones may yield slower results. Brands cannot expect immediate views as evergreen videos may take longer to build an audience.

    The good thing, though, is that the results are sustainable.

  2. Tips to Create Evergreen Video Content

    Creating evergreen content sounds challenging, and it requires a great deal of patience and foresight. We will list a few strategies to help.

    First up, topic relevance means half the battle is won. Instincts alone will not work. Creators should utilize tools like AnswerThePublic to identify topics that resonate with their audience.

    answer the public

    Next, remember that nothing matters more than quality visuals when it comes to creating quality content, specifically evergreen pieces that you hope will resonate with audiences for years to come. Invest in high-quality production values to enhance viewer engagement.

    Repurposing long-form content into bite-sized videos is a good idea. Viralpep can help you create short-form videos like Reels and Shorts and even cross-promote them on different platforms.

    Finally, partnering with industry leaders can lend credibility and attract viewers, just as with viral videos.

Choosing the Right Approach for Your Video Marketing Strategy

Now that you know the upsides and downsides of viral and evergreen content, it is time to answer the big question: what will work for your brand? The answer isn’t black and white.

You need to strike a balance between both for a successful video marketing strategy. Both serve distinct purposes within a broader marketing framework, making them apt for different situations.

For example, viral videos can give brands the much-needed push when introducing new products or services. They are also great for seasonal campaigns tied to holidays or events as they can leverage current trends for maximum impact.

Conversely, evergreen topics win the brand storytelling game. Sharing a brand’s history or mission with such videos fosters deeper connections over time. Likewise, educational content like tutorials and how-to guides become lasting assets for brands.

The Final Verdict

As we step into 2025, brands will have to rely on a mix of viral and evergreen content to shape effective marketing strategies. The combination promises the best of both worlds, with viral content driving immediate engagement and visibility and evergreen content ensuring sustained relevance and authority. A thoughtful integration promises the best results for short-term success and long-term growth.